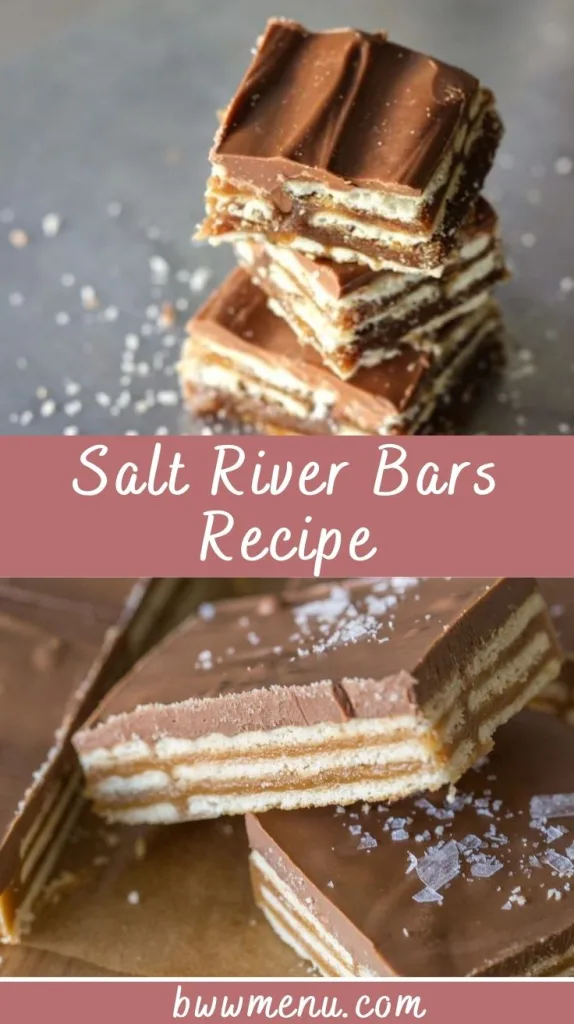
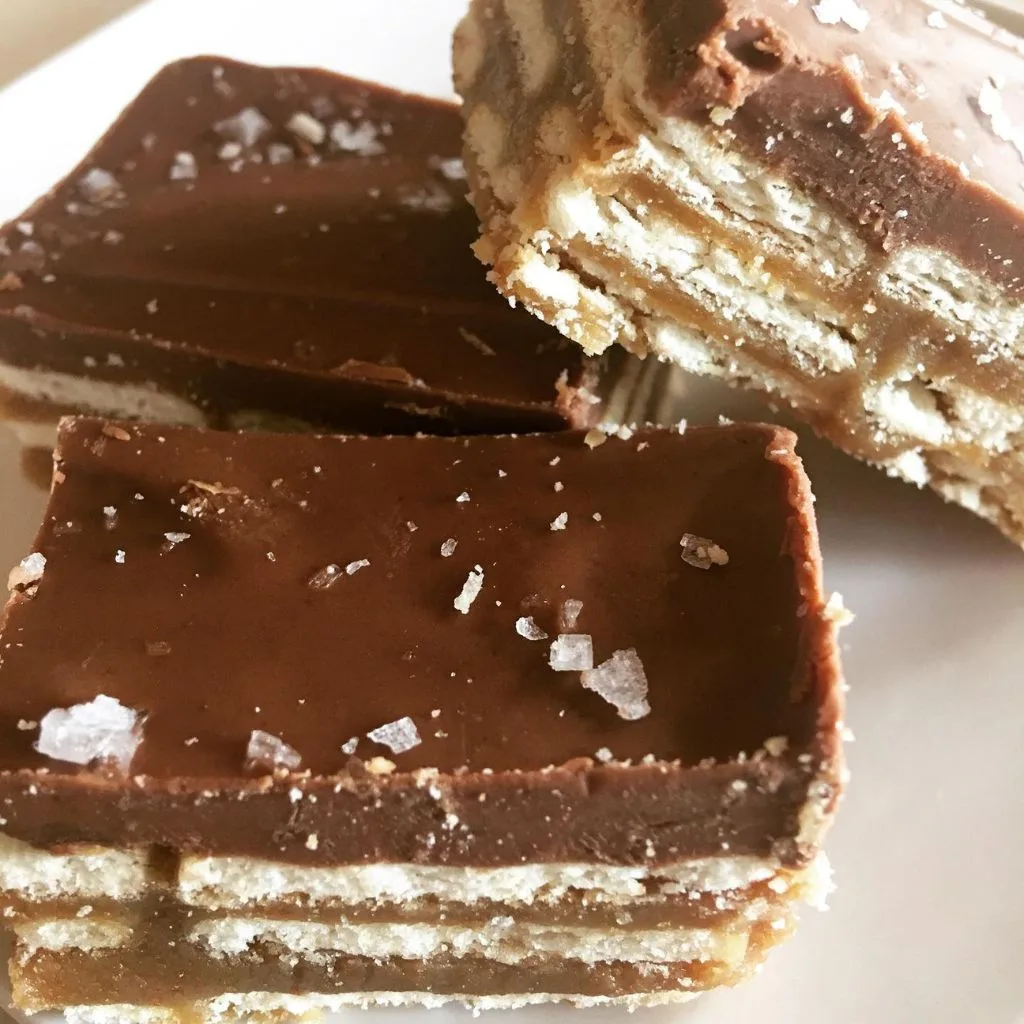
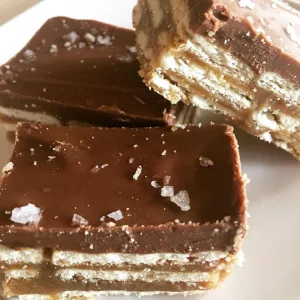
The first time I made Salt River Bars, I was blown away by how a few simple layers could create such a decadent treat. These bars are a delightful mix of sweet, salty, chewy, and crunchy, making every bite irresistible. When I first tried them, I couldn’t believe that something so gourmet-looking was this easy to whip up at home!
The hardest part? Waiting for them to chill before I could dig in. Whether you’re making them for a party or a snack to enjoy yourself, this recipe is sure to become a favorite. Trust me, once you share them, you’ll be asked for the recipe every single time.
Why You’ll Love This Recipe?
These bars are more than just a dessert; they’re little layered masterpieces. Here’s why you’ll fall in love with them too!
1. Easy But Impressive
Despite their fancy layers, these bars are surprisingly simple to make. The recipe doesn’t require fancy equipment or techniques. Even beginner bakers can pull these off like a pro.
2. A Perfect Flavor Combo
Salt River Bars hit every note, combining sweet caramel, smooth chocolate, and a pop of flaky sea salt. It’s the ultimate taste experience. Every bite delivers that irresistible salty-sweet balance.
3. Crowd-Pleaser
Everyone loves these bars. Take them to a family dinner, potluck, or picnic, and watch them disappear. They’re guaranteed to be the first dessert to vanish from the table.
4. Customizable Ingredients
Whether you prefer milk or dark chocolate or want to add a nutty crunch, this recipe can adapt to fit your cravings. It’s easy to make these your own with just a few tweaks.
5. Great for Prep Ahead
Because these bars need to be chilled, you can easily make them the day before and have them ready to serve without stress. Perfect for planning ahead during busy weeks or holidays.
Cooking Time
- Prep Time: 20 minutes
- Cooking Time: 10 minutes
- Total Time: 30 minutes
Ingredients
Here’s everything you’ll need to bring this dish to life:
- Club crackers
- Butter
- Brown sugar
- Graham cracker crumbs
- Heavy cream
- Milk chocolate chips
- Butterscotch chips
- Peanut butter
- Maldon sea salt
Variations
Want to make these bars uniquely yours? Try these simple swaps or additions to amp things up.
- Chocolate Options: Use dark or white chocolate instead of milk chocolate for a twist in flavor.
- Nutty Delight: Sprinkle chopped pecans or almonds on the chocolate layer before it sets for added crunch.
- Peanut Butter Alternative: Swap creamy peanut butter with almond butter or sunflower seed butter for a nut-free version.
- Salted Caramel: Add a drizzle of caramel sauce on top for extra indulgence.
Equipment You’ll Need
- 9×13-inch Pan: To layer the bars.
- Medium-Sized Saucepan: For making the caramel.
- Microwave-Safe Bowl: Perfect for melting chocolate and peanut butter.
- Parchment Paper: Ensures easy removal of the bars.
- Sharp Knife: For clean and even slices.
How to Make Salt River Bars?
Follow these fun and simple steps to create these irresistible bars. 😋
Prepare the Pan
Start by lining a 9×13-inch pan with parchment paper, leaving the edges slightly longer to help lift the bars out later. Spray the parchment and sides with nonstick spray.
Layer the Crackers
Lay your first layer of Club crackers across the bottom of the pan. Feel free to trim the crackers to ensure they fit perfectly.
Make the Caramel
Melt the butter, brown sugar, graham cracker crumbs, and heavy cream in a saucepan over medium heat, stirring constantly. Once it starts bubbling, boil for about seven minutes, stirring frequently. The caramel should look smooth and luscious. 🥄
Build the Layers
Pour half the caramel over the first layer of crackers, spreading it evenly. Quickly add another layer of crackers on top, pour the remaining caramel, and then finish with one final layer of crackers.
Add the Chocolate Topping
Melt the milk chocolate chips, butterscotch chips, and peanut butter in a microwave-safe bowl. Heat in short intervals (15 seconds), stirring each time until the mixture is smooth. Pour the topping over the last layer of crackers, spreading evenly to the edges. 🍫
Sprinkle Sea Salt
Add the crown jewel of this recipe, Maldon sea salt, over the chocolate. A teaspoon or so should do the trick, but you can adjust it to taste.
Chill and Slice
Place the pan in the fridge for 1-2 hours or until the layers have fully set. Once chilled, use the parchment paper edges to lift the bars out of the pan and slice them into rectangles or squares. Enjoy!
Tips for Making the Recipe
Master these tips to ensure your Salt River Bars turn out perfectly every time!
- Work Quickly with Caramel: The caramel mixture starts to set fast, so make sure you’re ready to layer the crackers as soon as you pour it.
- Even Chocolate Topping: To get that pretty, smooth finish on the chocolate layer, use an offset spatula or the back of a spoon to spread it carefully.
- Chill Thoroughly: Don’t skip the chilling time! This helps all the layers firm up, making it easier to cut cleanly.
- Store in the Fridge: These bars taste best when slightly chilled, so keep them stored in the refrigerator whenever possible.
How to Serve Salt River Bars?
Looking for creative ways to serve these layered delights?
- Simple Presentation: Cut them into bars or squares and serve on a decorative plate for an easy-to-grab dessert.
- Party-Style: Add them to a dessert platter with other bite-sized treats like brownies and cookies for variety.
- Garnish Game: Dust with a little cocoa powder or add a tiny drizzle of caramel for extra flair.
Pair them with coffee or tea for the perfect ending to any meal.
Nutritional Information
Each serving of Salt River Bars packs plenty of deliciousness but also some indulgence!
- Calories: 269
- Protein: 2.7g
- Carbohydrates: 29g
- Fat: 16g
Make Ahead and Storage
Salt River Bars are ideal for making ahead or saving leftovers.
- Make Ahead
These bars need chill time, so prepare them a day in advance for no-stress serving. - Storage Tips
Store the bars in an airtight container in the fridge for up to a week. They’ll retain their texture and flavor beautifully. To freeze, wrap individual bars tightly and place them in a freezer-safe container. They’ll keep well for up to three months.
Whether you’re whipping these up for a special occasion or just because, Salt River Bars are sure to impress. Their perfect combination of flavors and textures makes them nothing short of unforgettable. One bite, and you’ll understand the hype! Enjoy your creation! 🎉
Salt River Bars Recipe
Ingredients
- Club crackers
- Butter
- Brown sugar
- Graham cracker crumbs
- Heavy cream
- Milk chocolate chips
- Butterscotch chips
- Peanut butter
- Maldon sea salt
Instructions
- Start by lining a 9×13-inch pan with parchment paper, leaving the edges slightly longer to help lift the bars out later. Spray the parchment and sides with nonstick spray.
- Lay your first layer of Club crackers across the bottom of the pan. Feel free to trim the crackers to ensure they fit perfectly.
- Melt the butter, brown sugar, graham cracker crumbs, and heavy cream in a saucepan over medium heat, stirring constantly. Once it starts bubbling, boil for about seven minutes, stirring frequently. The caramel should look smooth and luscious. 🥄
- Pour half the caramel over the first layer of crackers, spreading it evenly. Quickly add another layer of crackers on top, pour the remaining caramel, and then finish with one final layer of crackers.
- Melt the milk chocolate chips, butterscotch chips, and peanut butter in a microwave-safe bowl. Heat in short intervals (15 seconds), stirring each time until the mixture is smooth. Pour the topping over the last layer of crackers, spreading evenly to the edges. 🍫
- Add the crown jewel of this recipe, Maldon sea salt, over the chocolate. A teaspoon or so should do the trick, but you can adjust it to taste.
- Place the pan in the fridge for 1-2 hours or until the layers have fully set. Once chilled, use the parchment paper edges to lift the bars out of the pan and slice them into rectangles or squares. Enjoy!
Notes
- Work Quickly with Caramel: The caramel mixture starts to set fast, so make sure you’re ready to layer the crackers as soon as you pour it.
- Even Chocolate Topping: To get that pretty, smooth finish on the chocolate layer, use an offset spatula or the back of a spoon to spread it carefully.
- Chill Thoroughly: Don’t skip the chilling time! This helps all the layers firm up, making it easier to cut cleanly.
- Store in the Fridge: These bars taste best when slightly chilled, so keep them stored in the refrigerator whenever possible.