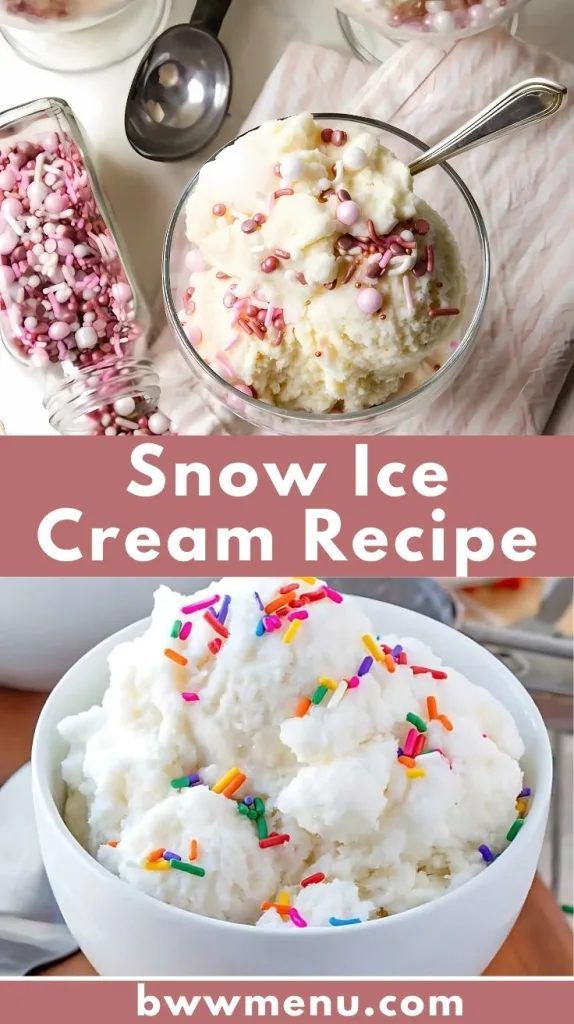
Imagine a fun recipe where you get to use freshly fallen snow as the star ingredient! Snow Ice Cream is a delightfully easy and unique dessert that’s perfect for both kids and adults. It’s quick to make, uses simple ingredients you already have at home, and doesn’t even require a stove or oven.
Whether you’re looking for a fun winter activity or a refreshing treat, this snow ice cream recipe will bring joy to your kitchen, especially on a snowy day. Plus, the recipe is highly customizable, so you can make it as classic or as creative as you like!
Get ready to scoop up a bowl of creamy, homemade ice cream made straight from winter’s most magical ingredient!
Cooking Time
One of the best things about this Snow Ice Cream recipe is how fast you can whip it up. There’s no long wait or elaborate preparation.
- Prep Time: 10 minutes
- Total Time: 10 minutes
Since this recipe relies on freshly fallen snow, timing is everything. Gather all your ingredients and tools before heading outside to collect the snow. Aim to collect the snow last so it stays cold and fresh. You can even involve the kids to make the process even more exciting!
Quick tip: Place the bowl you’ll be collecting the snow in inside your freezer ahead of time. This helps prevent the snow from melting too quickly once it’s indoors.
Essential Kitchen Equipment
To make this fun and easy recipe, you’ll only need a few kitchen tools, most of which you probably already have. Here’s a helpful list of what you’ll need:
- Mixing Bowl (preferably a cold one): Essential for mixing your ingredients together.
- Whisk or Wooden Spoon: Perfect for combining ingredients without creating too much air.
- Measuring Cups and Spoons: For precise measurements of your milk, sugar, and flavorings.
- Scooper or Large Spoon: To serve your finished ice cream with a touch of elegance.
- Freezer-safe Container (optional): Great if you plan to store leftovers or make extra.
Having the right tools ready ensures an easy process and the best results!
Ingredients
One of the biggest perks of this recipe is how accessible the ingredients are. You only need a handful of pantry staples to create your Snow Ice Cream. Here’s what you’ll need:
- 8 cups of fresh, clean snow
- 1 cup of whole milk
- 1/3 cup granulated sugar
- 1 teaspoon vanilla extract
- Optional toppings like sprinkles, chocolate chips, caramel sauce, or fresh fruit.
Ingredient Notes and Alternatives
If you’re looking to make this a healthy recipe, consider swapping the sugar with honey or maple syrup. For a richer flavor, substitute the milk with heavy cream or condensed milk. These variations allow you to tailor the dessert to your preferences.
Pro Tip: Always ensure the snow is freshly fallen and free of contamination. Using clean snow is key to a safe and delicious treat!
How to Make Snow Ice Cream Recipe?
Follow these simple, step-by-step instructions to create your snow ice cream. This is one of the easiest recipes you’ll try, and it’s filled with quick cooking tips along the way!

Start with Fresh Snow
Begin by collecting about 8 cups of clean, freshly fallen snow in a large bowl. It’s best to gather the snow from an untouched surface, away from roads, sidewalks, or areas with potential contaminants. Fluffy, powdery snow works best for a light and airy ice cream texture. Keep the bowl outside or in the freezer while you prepare the other ingredients to prevent melting.
Mix the Ingredients
In a separate mixing bowl, whisk together 1 cup of milk (or heavy cream), ½ cup of sugar, and 2 teaspoons of vanilla extract. Whisk thoroughly until the sugar completely dissolves into the liquid. You can also experiment by adding flavored extracts like almond or peppermint for a unique twist. If you prefer a richer texture, substitute half-and-half or condensed milk for extra creaminess.
Combine the Snow and Mixture
Slowly pour the sweetened milk mixture over the fresh snow while gently folding it in with a wooden spoon or spatula. Stir lightly to maintain the fluffy texture, ensuring all the snow is coated evenly. Be careful not to overmix, as the heat from your hands and the movement can cause the snow to melt, making the ice cream too slushy.
Taste and Adjust
Before serving, take a small spoonful and taste the mixture. If you prefer a sweeter flavor, add a bit more sugar and stir gently. You can also enhance the taste with a little extra vanilla or a pinch of salt to balance the sweetness. If you’d like a flavored version, mix in cocoa powder for chocolate snow ice cream or fruit puree for a fruity twist.
Add Toppings
Scoop the freshly made snow ice cream into serving bowls or cones. Enhance the flavor and presentation by adding toppings like chocolate chips, sprinkles, crushed cookies, or a drizzle of caramel or chocolate syrup. You can also mix in nuts, shredded coconut, or fruit pieces for added texture and flavor.
Serve Immediately
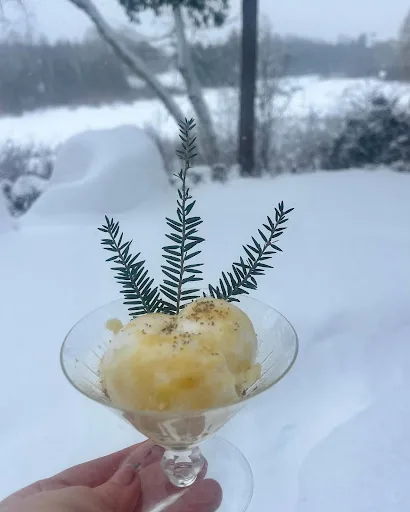
Snow ice cream melts quickly, so it’s best enjoyed right away. Serve it in chilled bowls to slow down melting and keep the texture smooth and creamy. If you need to store leftovers, place them in an airtight container in the freezer, but note that the texture may change. Enjoy your homemade snow ice cream while it’s fresh and fluffy!
Serving Suggestions
There are countless ways to make your Snow Ice Cream even more fun and festive. Here are some ideas to elevate your presentation:
- Pair It With Warm Desserts: Serve alongside brownies, pies, or a slice of warm apple crumble for a hot-and-cold treat combo.
- Add a Splash of Color: Mix in food coloring to make the ice cream vibrant. A rainbow-themed snow ice cream will surely impress kids.
- Holiday-Themed Flavors: Add peppermint extract for a holiday twist, or sprinkle it with crushed candy canes for a festive look.
Don’t forget to get creative with your garnishing options. Think chocolate drizzle, powdered sugar, or a dollop of whipped cream on top.
Tips for a Better Recipe
Enhance your Snow Ice Cream with these professional tips for more flavor and fun:
- Chill Your Tools: Place the mixing bowl and utensils in the freezer beforehand. This prevents the snow from melting during mixing.
- Go Light on the Mixing: Use gentle folding motions to combine the ingredients. Overworking the mixture can leave you with a slushy texture instead of fluffy ice cream.
- Experiment with Flavors: Replace vanilla with coconut extract, add a splash of espresso, or mix in a teaspoon of cocoa powder for a chocolatey delight.
- Make It Nutritious: Add chopped nuts or fruit for added crunch and nutrition. Consider strawberries, bananas, or blueberries for a refreshing fruity twist.
Nutritional Information
Here’s an approximate breakdown of the nutritional values for a single serving (1 cup) of Snow Ice Cream made with whole milk and sugar:
- Calories: 120
- Fat: 4g
- Carbohydrates: 20g
- Sugar: 19g
- Protein: 2g
Keep in mind, these values will vary depending on the specific ingredients you use and any added toppings.
Storage and Leftover Tips
Snow Ice Cream is best enjoyed fresh. However, if you have leftovers, here’s how to keep them:
- Freezing Tips: Place the ice cream in an airtight, freezer-safe container immediately after preparation. Smooth out the surface and cover with plastic wrap before sealing the lid.
- How Long Does It Last?: Snow Ice Cream can be stored in the freezer for up to 2 days. However, its texture may harden, and it won’t be as fluffy after storage.
- Re-soften Before Serving: To bring it back to a scoopable texture, remove it from the freezer and allow it to sit at room temperature for 10-15 minutes.
Snow Ice Cream Recipe
Ingredients
- 8 cups of fresh clean snow
- 1 cup of whole milk or any milk alternative like almond milk or oat milk for a dairy-free option
- 1/3 cup granulated sugar use a sugar substitute like stevia if you’re going for a low-sugar version
- 1 teaspoon vanilla extract or try almond extract for a twist
- Optional toppings like sprinkles chocolate chips, caramel sauce, or fresh fruit.
Instructions
- Begin by collecting about 8 cups of clean, freshly fallen snow in a large bowl. It’s best to gather the snow from an untouched surface, away from roads, sidewalks, or areas with potential contaminants. Fluffy, powdery snow works best for a light and airy ice cream texture. Keep the bowl outside or in the freezer while you prepare the other ingredients to prevent melting.
- In a separate mixing bowl, whisk together 1 cup of milk (or heavy cream), ½ cup of sugar, and 2 teaspoons of vanilla extract. Whisk thoroughly until the sugar completely dissolves into the liquid. You can also experiment by adding flavored extracts like almond or peppermint for a unique twist. If you prefer a richer texture, substitute half-and-half or condensed milk for extra creaminess.
- Slowly pour the sweetened milk mixture over the fresh snow while gently folding it in with a wooden spoon or spatula. Stir lightly to maintain the fluffy texture, ensuring all the snow is coated evenly. Be careful not to overmix, as the heat from your hands and the movement can cause the snow to melt, making the ice cream too slushy.
- Before serving, take a small spoonful and taste the mixture. If you prefer a sweeter flavor, add a bit more sugar and stir gently. You can also enhance the taste with a little extra vanilla or a pinch of salt to balance the sweetness. If you’d like a flavored version, mix in cocoa powder for chocolate snow ice cream or fruit puree for a fruity twist.
- Scoop the freshly made snow ice cream into serving bowls or cones. Enhance the flavor and presentation by adding toppings like chocolate chips, sprinkles, crushed cookies, or a drizzle of caramel or chocolate syrup. You can also mix in nuts, shredded coconut, or fruit pieces for added texture and flavor.
- Snow ice cream melts quickly, so it’s best enjoyed right away. Serve it in chilled bowls to slow down melting and keep the texture smooth and creamy. If you need to store leftovers, place them in an airtight container in the freezer, but note that the texture may change. Enjoy your homemade snow ice cream while it’s fresh and fluffy!
Notes
- Chill Your Tools: Place the mixing bowl and utensils in the freezer beforehand. This prevents the snow from melting during mixing.
- Go Light on the Mixing: Use gentle folding motions to combine the ingredients. Overworking the mixture can leave you with a slushy texture instead of fluffy ice cream.
- Experiment with Flavors: Replace vanilla with coconut extract, add a splash of espresso, or mix in a teaspoon of cocoa powder for a chocolatey delight.
- Make It Nutritious: Add chopped nuts or fruit for added crunch and nutrition. Consider strawberries, bananas, or blueberries for a refreshing fruity twist