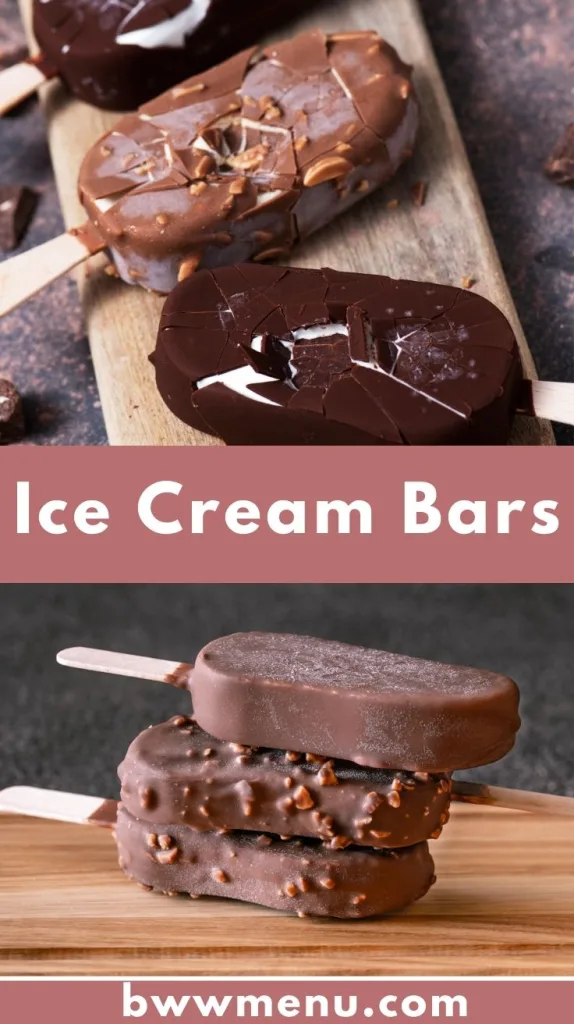
Who doesn’t love the cool, creamy delight of ice cream bars? These versatile treats are a perfect indulgence for hot summer days or casual get-togethers. Making ice cream bars at home is surprisingly easy and incredibly rewarding.
You can control the ingredients, experiment with flavors, and even opt for healthier choices. Whether you’re a dessert enthusiast or a DIY recipe lover, this guide will show you exactly how to craft irresistible ice cream bars in your own kitchen. Trust us, once you try it, there’s no going back to store-bought options!
Cooking Time
One of the best parts of this recipe? It doesn’t take an eternity to make! Here’s the breakdown of the time you’ll need:
- Prep Time: 15-20 minutes
- Freezing Time: 4-6 hours
- Total Time: About 6-7 hours (most of which is hands-off freezing!)
Time-Saving Tips:
- Set up all your ingredients and tools before starting. This keeps the process smooth.
- Use silicone molds for easy demolding. They save time and effort when it’s time to take out the bars.
- Plan ahead! Prep the mixture in the evening, freeze overnight, and wake up to delicious ice cream bars ready to enjoy.
Essential Kitchen Equipment
To make the perfect ice cream bars, having the right kitchen tools is half the battle. Here are the essentials you’ll need (and why they’re important):
- Mixing Bowls: For whipping up your creamy base.
- Hand Mixer or Stand Mixer: To achieve that smooth, velvety ice cream mixture.
- Silicone Ice Cream Bar Molds: These are must-haves for shaping your bars. They’re flexible and ensure easy removal without damaging the bars.
- Popsicle Sticks: You can’t forget these for the classic ice cream bar experience!
- Spatula or Spoon: Helpful for spreading the mixture evenly in the molds.
- Microwave-Safe Bowls: Ideal for melting chocolate or other coatings for your bars.
Having the right equipment ensures the process is seamless, and you’ll be serving up irresistible frozen treats in no time.
Ingredients
Here’s a detailed list of everything you’ll need. Feel free to adapt depending on your preferences!
Ice Cream Base
- 2 cups heavy cream
- 1 cup condensed milk
- 1 teaspoon vanilla extract
Flavor Additions (Choose or Mix!):
- 1/2 cup crushed berries
- 2 tablespoons cocoa powder
- 1/4 cup peanut butter
Coating and Toppings
- 2 cups dark or milk chocolate chips
- 2 tablespoons coconut oil
- Chopped nuts, sprinkles, or shredded coconut for added texture
Ingredient Variations:
Looking for healthy ingredients? Use Greek yogurt instead of heavy cream, and opt for honey or natural sweeteners over condensed milk. Want something quick and easy? Stick to basic vanilla!
How to Make Ice Cream Bars?
If you’re wondering how to cook or prepare the ultimate ice cream bars, here’s an easy recipe to follow step-by-step.

Step 1: Make the Ice Cream Base
Pour the heavy cream into a mixing bowl. Using a hand mixer, whip it until it forms soft peaks. Gently fold in the condensed milk and vanilla extract. Combine well, but keep the mixture fluffy.
Step 2: Add Flavorings
For a fruity version, fold in the crushed berries. Moreover, for chocolate bars, mix in the cocoa powder until smooth. Experiment with different flavors like caramel, mint, or cookie bits!
Step 3: Fill the Molds
Spoon your mixture into the silicone molds, leaving a little space at the top for expansion. Insert popsicle sticks firmly into the center. Tap the molds gently to remove air bubbles.
Step 4: Freeze
Place your molds in the freezer for at least 4-6 hours, or until the bars are fully set.
Step 5: Make the Coating
Melt your chocolate chips with coconut oil in short, 20-second intervals in the microwave, stirring in between. Once melted, allow it to cool slightly but remain liquid.
Step 6: Dip and Decorate
Remove your ice cream bars from the molds. Quickly dip them into the chocolate coating. Sprinkle with toppings like nuts or sprinkles before the chocolate hardens. Place on a lined tray and freeze for an additional 15 minutes to set the coating.
Now, your delicious homemade ice cream bars are ready to enjoy!
Serving Suggestions
Ice cream bars are already an indulgent treat, but you can get creative with how you serve them!
- Summer Parties: Arrange them on a platter with assorted flavors for guests to pick and choose.
- Drizzled with Sauce: Add some caramel or berry sauce drizzled on top for extra flair.
- Paired with Drinks: Serve alongside iced coffee, lemonades, or even sparkling water for a refreshing combo.
The best part? Create unique pairings every time to match your mood or the occasion.
Tips for a Better Recipe
Take your ice cream bars to the next level with these pro tips.
- Use High-Quality Ingredients: The better your cream and chocolate, the richer the flavor.
- Customize for Nutrition: Add mashed bananas or pureed avocado for a healthier twist.
- Layer Flavors: Try layering two mixtures (like vanilla and chocolate) for a striped effect.
- Make Vegan Options: Swap dairy with plant-based alternatives like coconut cream or almond milk.
Little tweaks can make your bars even more irresistible!
Nutritional Information
Here’s a general breakdown for one standard-sized ice cream bar (without toppings):
- Calories: 260
- Fat: 18g
- Sugar: 20g
- Protein: 3g
Remember, the nutritional value can vary depending on the specific ingredients you use. Opt for healthier ingredients if you’re calorie-conscious!
Storage and Leftover Tips
Homemade ice cream bars are best enjoyed fresh, but you can store extras too.
- Freezer Shelf Life: Ice cream bars can be stored in the freezer for up to two weeks. Make sure they’re wrapped tightly in parchment paper or stored in an airtight container to prevent freezer burn.
- Re-Coating Option: If the chocolate coating chips, simply re-dip it for a fresh finish.
Pro Tip: Label your bars with the flavor and date to keep track of freshness!
Ice Cream Bars Recipe
Ingredients
- 2 cups heavy cream or coconut cream for a dairy-free alternative
- 1 cup condensed milk or sweetened almond milk for a lighter option
- 1 teaspoon vanilla extract
- 1/2 cup crushed berries for fruity options
- 2 tablespoons cocoa powder for a chocolatey kick
- 1/4 cup peanut butter for a nutty twist
- 2 cups dark or milk chocolate chips
- 2 tablespoons coconut oil makes the coating silky and smooth
- Chopped nuts sprinkles, or shredded coconut for added texture
Instructions
- Pour the heavy cream into a mixing bowl. Using a hand mixer, whip it until it forms soft peaks.
- Gently fold in the condensed milk and vanilla extract. Combine well, but keep the mixture fluffy.
- For a fruity version, fold in the crushed berries.
- For chocolate bars, mix in the cocoa powder until smooth.
- Experiment with different flavors like caramel, mint, or cookie bits!
- Spoon your mixture into the silicone molds, leaving a little space at the top for expansion.
- Insert popsicle sticks firmly into the center. Tap the molds gently to remove air bubbles.
- Place your molds in the freezer for at least 4-6 hours, or until the bars are fully set.
- Melt your chocolate chips with coconut oil in short, 20-second intervals in the microwave, stirring in between.
- Once melted, allow it to cool slightly but remain liquid.
- Remove your ice cream bars from the molds. Quickly dip them into the chocolate coating.
- Sprinkle with toppings like nuts or sprinkles before the chocolate hardens.
- Place on a lined tray and freeze for an additional 15 minutes to s
Notes
- Freezer Shelf Life: Ice cream bars can be stored in the freezer for up to two weeks. Make sure they’re wrapped tightly in parchment paper or stored in an airtight container to prevent freezer burn.
- Re-Coating Option: If the chocolate coating chips, simply re-dip it for a fresh finish.