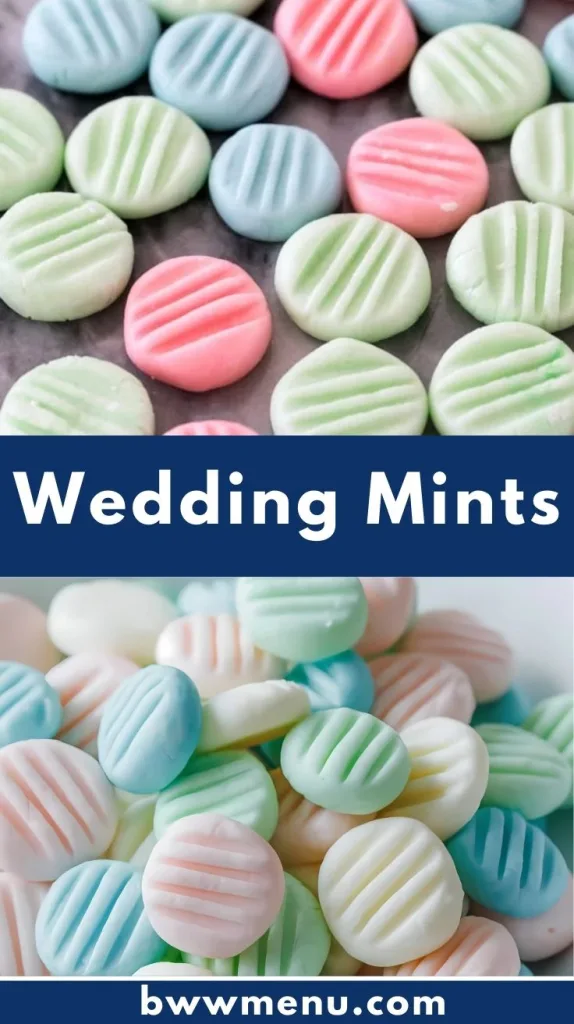
Wedding mints are a timeless treat that adds a touch of elegance to any celebration. These delightful candies aren’t just reserved for weddings; they’re also great for baby showers, holidays, or even an afternoon tea party. Their creamy, melt-in-your-mouth texture paired with a refreshing burst of peppermint makes them a crowd-pleaser every time.
Whether you’re planning a wedding or just looking to satisfy your sweet tooth, this easy recipe is worth a try. Plus, with simple ingredients and an easy-to-follow process, even beginner cooks can whip these up effortlessly!
Cooking Time
Creating these delicious wedding mints won’t take up your whole day. Here’s a breakdown of the time required:
- Prep Time: 30 minutes
- Chill Time: 2 hours
- Total Time: 2.5 hours
While the preparation itself is quick, giving the mints enough time to chill and set properly is essential. To save time, measure and sort all your ingredients before starting. Using a stand mixer or hand mixer will also significantly reduce preparation time.
Essential Kitchen Equipment
For this recipe, you won’t need a lot of fancy equipment, but having the right tools on hand ensures a smooth cooking process. These are the must-have kitchen gadgets and tools:
- Mixing bowls (various sizes)
- Stand mixer or hand mixer for mixing the dough
- Rubber or silicone spatula to scrape the sides of the bowl
- Measuring cups and measuring spoons for accuracy
- Rolling pin for flattening
- Fork for creating a decorative texture on the mints
- Baking parchment paper or a non-stick baking mat
- Cookie cutters or candy molds for shaping the mints
Having these tools on hand will make the process seamless and ensure your mints look as beautiful as they taste.
Ingredients
To make these creamy, delectable wedding mints, you’ll need the following:
- Cream cheese (softened) – 4 ounces
- Powdered sugar – 4 cups
- Peppermint extract – ½ teaspoon (adjust to taste)
- Food coloring – optional, pick colors to match your theme (e.g., pastel pink, blue, or green)
- Granulated sugar – for rolling and coating the mints
Ingredient Variations:
- Healthy Ingredients: Use reduced-fat cream cheese for a lighter version.
- Natural Colors: Substitute artificial food coloring with natural options like beet powder or matcha for a healthy twist.
- Extra Flavors: Experiment with flavors such as almond extract, vanilla, or lemon for a creative spin.
These easy ingredients are available in most kitchens, making the recipe super convenient and affordable to prepare.
Recipe Guidelines (How to Make?)

Step 1: Prepare the Cream Cheese Mixture
- Place the softened cream cheese in a mixing bowl. Use a hand or stand mixer to beat until smooth.
- Gradually add powdered sugar, one cup at a time, and continue mixing until it forms a thick, dough-like consistency.
Step 2: Add Flavor and Color
- Stir in the peppermint extract. Taste and adjust the amount to your liking.
- If using food coloring, separate the dough into small batches and mix in a drop or two of color until evenly distributed.
Step 3: Shape the Mints
- Take a small amount of dough (about 1 teaspoon) and roll it into a ball using your hands.
- Roll the ball in granulated sugar and place it on a parchment-lined baking sheet.
- Flatten each ball gently using a fork, or press into candy molds for a decorative finish.
Step 4: Chill to Set
- Once all the mints are shaped, refrigerate them for at least 2 hours to firm up.
Step 5: Serve and Enjoy
- Your wedding mints are now ready to be served! Arrange them on a decorative platter to make an elegant display.
This easy recipe will quickly become your go-to for creating small-batch, fuss-free candy treats.
Serving Suggestions
Your wedding mints deserve to be presented beautifully. Here are some creative serving ideas to inspire you:
- Perfect Pairing: Place them alongside a delicate dessert tray featuring cookies, mini cakes, or chocolate truffles.
- Garnished Elegance: Add a sprinkle of edible glitter or crushed candy canes for a festive touch.
- Customized Wrapping: Wrap individual mints in mini candy wrappers for party favors or gifts.
- Thematic Display: Arrange them in colors that match your wedding or event theme, blending beautifully into your decor.
These ideas elevate the presentation, making your homemade treats truly memorable.
Tips for a Better Recipe
Want to guarantee your wedding mints turn out perfect? Here are some professional tips:
- Achieve the Right Texture: If your dough feels too sticky, add more powdered sugar sparingly until it firms up.
- Be Patient: Give the mints enough chilling time to fully set before serving.
- Make It Pepperminty: Opt for high-quality peppermint extract for the best flavor.
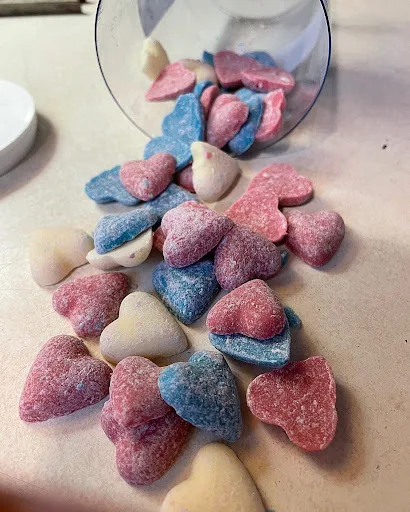
- Get Creative with Shapes: Use themed molds or cookie cutters for creative shapes like hearts, stars, or flowers.
- Nutritious Swap: Use low-sugar powdered alternatives if you’re looking to cut back on sweetness.
Applying these techniques will help you create irresistibly good wedding mints each time.
Nutritional Information
Here’s a quick overview of the nutritional value in these wedding mints. (Based on one serving, approximately 2 mints):
- Calories: 110
- Fat: 2g
- Carbohydrates: 20g
- Sugar: 18g
- Protein: 1g
If you’re altering ingredients for a healthier version (e.g., low-fat cream cheese), the nutritional facts may vary slightly.
Storage and Leftover Tips
Wedding mints store wonderfully, which means you can make them ahead of time! Here’s how to keep them fresh:
- Refrigerator: Store mints in an airtight container, layered between sheets of parchment paper to prevent sticking. They’ll stay fresh for up to 2 weeks.
- Freezer: Freeze leftovers in a Ziploc bag for up to 3 months. Thaw them in the refrigerator overnight before serving.
Proper storage ensures your homemade mints maintain their freshness, flavor, and texture.
Wedding Mints Recipe
Ingredients
- Cream cheese softened – 4 ounces
- Powdered sugar – 4 cups
- Peppermint extract – ½ teaspoon adjust to taste
- Food coloring – optional pick colors to match your theme (e.g., pastel pink, blue, or green)
- Granulated sugar – for rolling and coating the mints
Instructions
- Place the softened cream cheese in a mixing bowl. Use a hand or stand mixer to beat until smooth.
- Gradually add powdered sugar, one cup at a time, and continue mixing until it forms a thick, dough-like consistency.
- Stir in the peppermint extract. Taste and adjust the amount to your liking.
- If using food coloring, separate the dough into small batches and mix in a drop or two of color until evenly distributed.
- Take a small amount of dough (about 1 teaspoon) and roll it into a ball using your hands.
- Roll the ball in granulated sugar and place it on a parchment-lined baking sheet.
- Flatten each ball gently using a fork, or press into candy molds for a decorative finish.
- Once all the mints are shaped, refrigerate them for at least 2 hours to firm up.
- Your wedding mints are now ready to be served! Arrange them on a decorative platter to make an elegant display.
Notes
- Refrigerator: Store mints in an airtight container, layered between sheets of parchment paper to prevent sticking. They’ll stay fresh for up to 2 weeks.
- Freezer: Freeze leftovers in a Ziploc bag for up to 3 months. Thaw them in the refrigerator overnight before serving.