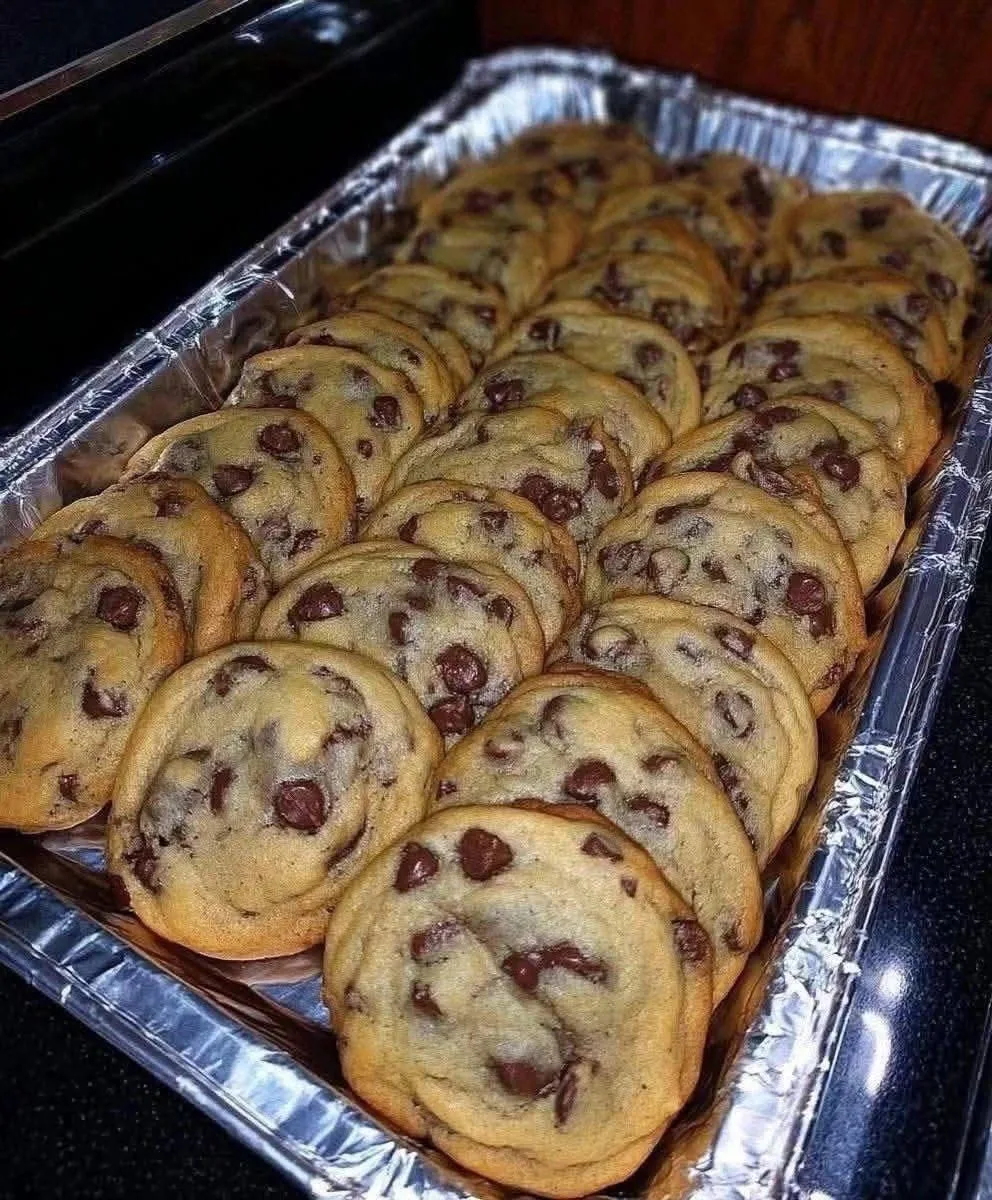
As you step into your kitchen to prepare for this baking adventure, remember that enjoying the process is just as important as eating the final reward. The sweet smell of browning butter and sugar slowly filling up your kitchen will make your mouth water long before the timer goes off. Watching simple white flour, yellow butter, and dark chocolate chips transform into golden brown wheels of joy is truly a fascinating thing to experience. You will learn how minor changes in temperature and mixing technique can change the final texture from soft and cakey to delightfully dense and chewy. This guide breaks down every single detail into plain words so that even a complete novice can step up to the counter with full confidence. You do not have to worry about complicated jargon or confusing measurements because everything here is made as straightforward as possible. So put on your favorite apron, turn on your oven, and get ready to create a batch of baked perfection that will impress everyone who takes a bite.
Ingredients You Will Need
To make a batch of these delicious treats, you will need to gather these basic components from your pantry or local grocery store. Make sure to measure everything accurately before you start mixing.
- 1 cup of unsalted butter softened at room temperature
- 1 cup of granulated white sugar
- 1 cup of packed light brown sugar
- 2 large eggs at room temperature
- 2 teaspoons of pure vanilla extract
- 3 cups of all purpose flour
- 1 teaspoon of baking soda
- half a teaspoon of baking powder
- 1 teaspoon of fine sea salt
- 2 cups of semi sweet chocolate chips
- 1 cup of milk chocolate chips or dark chocolate chunks
Step by Step Method
Preparing Your Oven and Baking Sheets
Start your baking journey by setting your oven to 375 degrees Fahrenheit so it has plenty of time to reach the right temperature while you prepare the dough. An oven that is fully preheated is the secret to getting that perfect lift and golden brown color on your finished treats. Next, take two large metal baking sheets and line them with sheets of parchment paper. Parchment paper is a fantastic tool because it prevents the dough from sticking to the hot metal and makes cleaning up later super easy. If you do not have parchment paper, you can lightly grease your sheets with a tiny bit of butter or cooking spray.
Mixing the Wet Ingredients
Take a large mixing bowl and place your softened unsalted butter inside. Add both the granulated white sugar and the packed light brown sugar into the same bowl. Using a hand mixer or a sturdy wooden spoon, beat the butter and sugars together for about two to three minutes until the mixture looks pale, fluffy, and smooth. This step is called creaming, and it introduces small air bubbles that help structure your dough. Next, crack your two room temperature eggs into the bowl one at a time, mixing well after each addition. Finally, pour in the pure vanilla extract and mix until everything is combined into a creamy liquid base.
Combining the Dry Ingredients
In a separate medium sized bowl, add your all purpose flour, baking soda, baking powder, and fine sea salt. Use a metal whisk or a fork to gently stir these dry items together for about thirty seconds. Whisking helps remove any small lumps in the flour and ensures that the leavening agents like baking soda are evenly distributed throughout the mixture. This step prevents you from getting a bitter bite of baking soda in your finished treat later on.
Joining the Dry and Wet Mixtures
Slowly add your whisked dry ingredients into the large bowl containing your creamy wet mixture. It is best to add the flour mixture in three small batches rather than all at once. Mix on low speed or use a rubber spatula to fold the ingredients together gently just until the white flour disappears into the dough. Be very careful not to overmix the dough at this stage. Overmixing creates too much gluten, which can make your final baked goods tough and heavy instead of tender and soft.
Folding in the Chocolate Chips
Now comes the most exciting part of the process, which is adding the delicious chocolate pieces. Dump your two cups of semi sweet chocolate chips and one cup of milk chocolate chips directly into the dough. Use your rubber spatula or wooden spoon to gently fold the chocolate into the dough until the chips are spread out evenly from top to bottom. Every single spoonful of dough should have a generous amount of chocolate pieces embedded inside it.
Chilling the Dough
While you can bake the dough right away, placing the bowl into your refrigerator for at least thirty minutes makes a huge difference in flavor and texture. Chilling allows the flour to fully absorb the liquids and firms up the butter inside the dough. Cold butter melts much slower in a hot oven, which prevents your dough from spreading out into flat greasy disks on the baking sheet. If you have the patience to wait, chilling your dough will elevate your results from good to absolute perfection.
Scooping and Baking
Take your chilled dough out of the refrigerator and use a small ice cream scoop or a large spoon to drop round balls of dough onto your prepared baking sheets. Each ball should be about the size of a golf ball, leaving about two inches of space between each ball so they have room to expand as they bake. Slide the baking sheets into the middle rack of your preheated oven. Bake for about nine to eleven minutes. You will know they are done when the outer edges are set and lightly golden brown while the center still looks slightly soft and undercooked.
Cooling and Storing
Carefully remove the hot baking sheets from your oven using oven mitts and set them on a heat safe counter. Let the baked treats sit undisturbed on the hot pan for five full minutes. During these five minutes, the heat from the pan will finish cooking the centers without drying them out. After five minutes, use a spatula to transfer them to a wire cooling rack so air can circulate underneath them. Let them cool down for another ten minutes before eating, or enjoy them while they are still warm with a cold glass of milk. Store any leftovers in an airtight container at room temperature to keep them soft for days.
Why This Recipe Is Special
This particular recipe is truly special because it strikes a flawless balance between classic comfort and foolproof baking techniques. By combining both white sugar and brown sugar, you get the crisp edges from the white sugar along with the deep caramel flavor and moisture from the brown sugar. Using two different types of chocolate chips adds a layer of rich flavor complexity that keeps every bite interesting and delightfully sweet. It is a reliable recipe that produces amazing results every single time, whether you are an absolute beginner or an experienced home cook.
From a wellness perspective, making your own sweet treats at home is always a much better choice than buying prepackaged versions from a store shelf. Store bought items often contain artificial preservatives, hydrogenated oils, and chemical flavor enhancers designed to keep them shelf stable for months. When you bake at home, you have complete control over every single ingredient entering your body. You are using real butter, real eggs, and pure vanilla without any hidden chemicals or weird additives. Enjoying a real homemade treat allows you to practice mindful eating while satisfying your sweet tooth with high quality ingredients.
Extra Tips for Better Taste
If you want to take these sweet creations to an extraordinary level, try sprinkling a tiny pinch of flaky sea salt over the top of each dough ball right before they go into the oven. The salty flakes cut through the rich sweetness of the chocolate and bring out the deeper caramel notes of the brown sugar. Another fun trick is to brown your butter in a saucepan on the stove before mixing it with the sugars. Browning the butter cooks the milk solids and gives your dough a incredible nutty aroma that tastes like high end artisan bakery creations.
For those who love extra texture in their desserts, you can add half a cup of chopped walnuts or pecans along with the chocolate chips. Make sure to toast the nuts in a dry pan for a few minutes first to release their natural oils and heighten their flavor. If you prefer a extra thick and cakey texture, you can add an extra quarter cup of flour to the dough. If you prefer a thinner and crispier treat, use a little less flour and bake them for one extra minute until the entire surface turns a lovely golden hue.
Final Thoughts
Baking a fresh batch of Classic Chocolate Chip Cookies is one of the most rewarding and delightful activities you can do in your own home. It fills your living space with an irresistible sweet scent and offers a warm delicious reward that brings instant smiles to everyone around you. Do not be afraid to jump in and try this simple recipe even if you have never baked anything from scratch before in your life. With a little bit of patience and these clear instructions, you are going to create something truly delicious that you can be proud of. Enjoy every warm bite, share them with the people you love, and happy baking.
Nutrition Details
Here is an estimated look at the nutritional content contained in one single baked treat, based on a full batch of twenty four individual pieces.
| Nutrient Type | Amount Per Serving |
| Calories | 195 calories |
| Total Fat | 10 grams |
| Saturated Fat | 6 grams |
| Sodium | 135 milligrams |
| Total Carbohydrates | 26 grams |
| Dietary Fiber | 1 gram |
| Total Sugars | 17 grams |
| Protein | 2 grams |
| Vitamin A | 4 percent of daily value |
| Iron | 6 percent of daily value |
| Calcium | 2 percent of daily value |
Disclaimer
Please remember that everyone’s body is completely different and individual health needs can vary greatly from person to person. The nutritional values provided in the table above are general estimates based on standard ingredient calculations and actual values may change based on specific brands used. If you have specific medical conditions, severe food allergies, or unique dietary guidelines, please consult with a qualified health professional or registered dietitian. This article is intended for educational and home cooking enjoyment only and should not replace professional dietary or health advice.