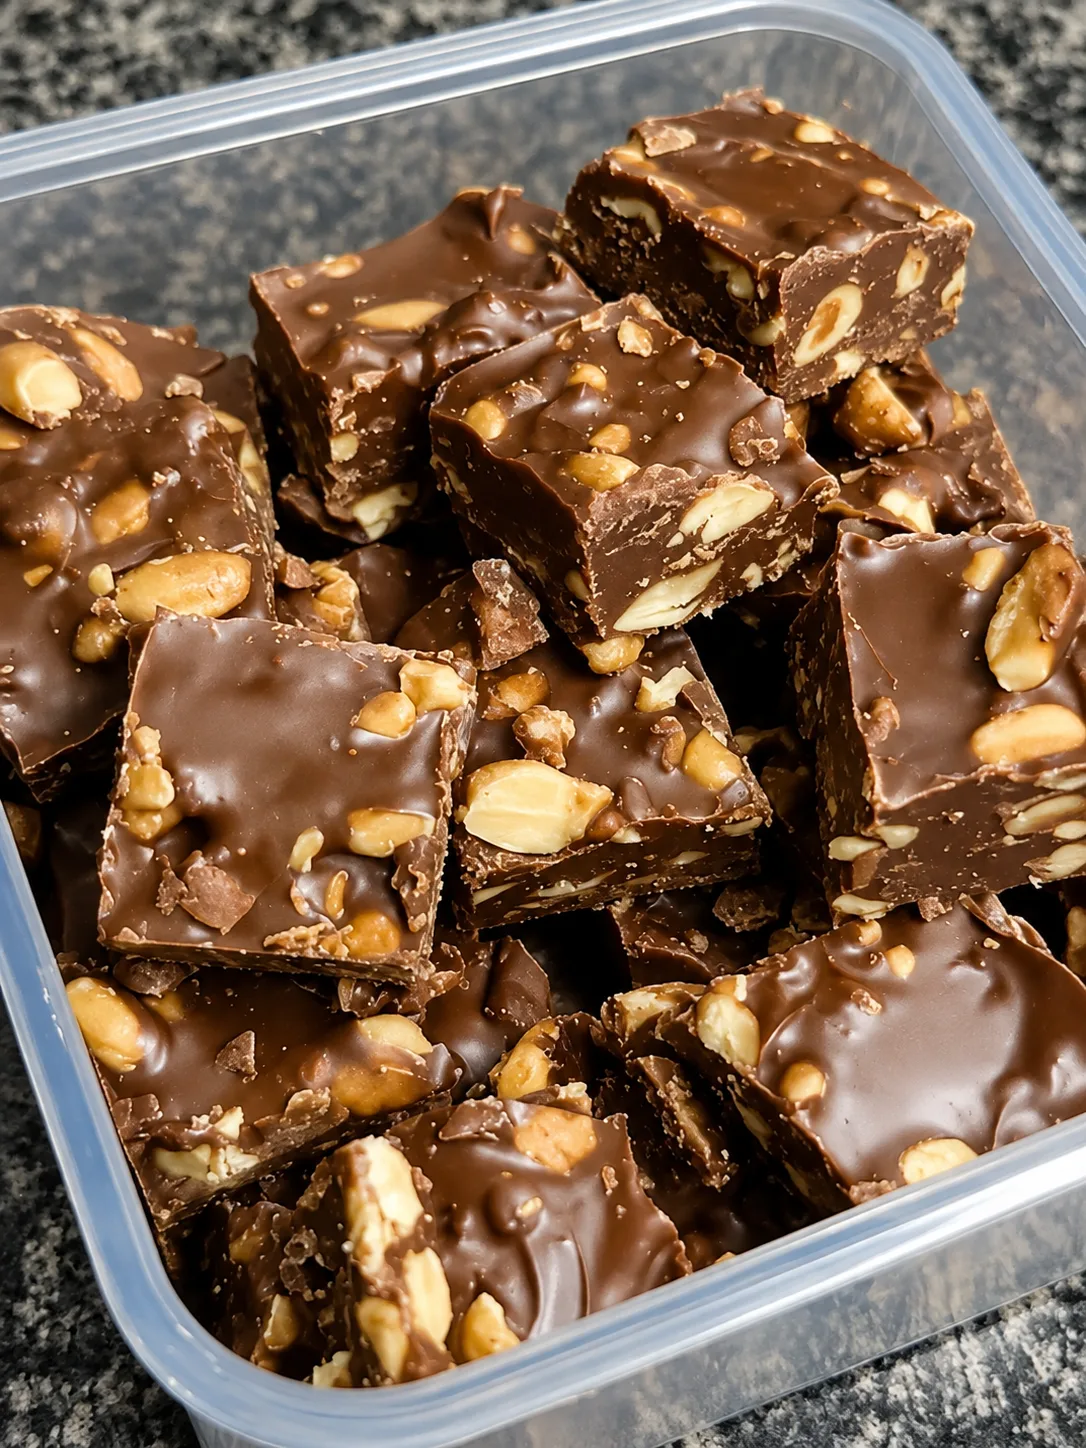
These No-Bake Homemade Crunch Bars are chocolatey, crispy, nutty, and wonderfully easy to make. A rich sugar-free chocolate coating combines with creamy peanut butter and crunchy cereal to create a satisfying homemade treat without turning on the oven.
They’re a convenient lower-sugar dessert or snack that comes together in minutes and stores beautifully in the refrigerator or freezer. With no complicated baking steps, these crunch bars are perfect whenever a chocolate craving strikes.
Can These No-Bake Crunch Bars Support Weight Loss Goals?
These bars can fit into a balanced, calorie-conscious eating pattern when enjoyed in a reasonable portion. Peanut butter and nuts provide fat and some protein, while using sugar-free chocolate and a controlled amount of crunchy cereal helps manage the overall carbohydrate and calorie content.
Because peanut butter and chocolate are calorie-dense, portion size is important. Cutting the mixture into evenly sized bars makes it easier to keep servings consistent.
Does This Recipe Fit a High-Protein Lifestyle?
These crunch bars are protein-friendly but not a high-protein food on their own. Peanut butter and almonds provide some protein, while the crunchy cereal contributes most of the carbohydrates. For a higher-protein snack, pair a bar with plain Greek yogurt or another protein-rich food. Using a protein-fortified cereal can also increase the protein content.
Why This Recipe Is Special
- No baking required: Everything comes together without an oven.
- Lower in added sugar: Uses sugar-free chocolate and a zero-sugar sweetener.
- Crunchy and creamy: Crispy cereal contrasts beautifully with smooth peanut butter and chocolate.
- Quick homemade treat: Preparation takes only about 10–15 minutes.
- Freezer-friendly: The bars can be stored frozen for a convenient dessert.
My Personal Experience
- The chocolate-peanut butter combination makes these irresistible.
The creamy peanut butter softens the richness of the chocolate while adding a delicious nutty flavor. - The crunch stays surprisingly satisfying.
Crispy cereal gives every bite a light, crunchy texture against the smooth chocolate coating. - They are incredibly easy to prepare.
Since there is no oven involved, these bars are especially convenient on busy days. - Chilling makes them easy to slice.
Giving the bars enough refrigerator time allows the chocolate mixture to firm up properly. - They’re excellent straight from the freezer.
A few minutes at room temperature gives them a firmer-but-chewy texture that’s especially refreshing.
Perfect For
These No-Bake Crunch Bars are perfect for diabetes-conscious desserts, afternoon snacks, lunchbox treats, meal prep, holiday dessert trays, family gatherings, quick chocolate cravings, summer treats, and freezer-friendly snacks.
Why You’ll Love This Recipe
- No oven needed
Perfect when you want homemade treats without heating the kitchen. - Ready quickly
The active preparation takes only a few minutes. - Chocolatey and crunchy
Every bite combines rich chocolate with satisfying crisp texture. - Lower in added sugar
Sugar-free chocolate and a zero-sugar sweetener help reduce added sugar. - Easy to portion
Cutting the chilled mixture into equal bars makes serving simple. - Great for make-ahead snacks
They keep well in both the refrigerator and freezer.
Common Mistakes to Avoid
- Overheating the chocolate — Excessive heat can cause chocolate to become thick or seize. Melt it gently.
- Adding too much cereal — Too much crunch mixture can make the bars dry and difficult to hold together.
- Not pressing firmly enough — Compact the mixture well so the bars don’t crumble after chilling.
- Cutting before fully chilled — Give the bars enough time to firm up before slicing.
- Using sweetened peanut butter — Added sugar can significantly change the nutritional profile.
Required Equipment
- Microwave-safe bowl — makes melting the chocolate and peanut butter quick and easy.
- Rubber spatula — thoroughly combines the mixture without wasting ingredients.
- 8 × 8-inch baking pan — creates evenly sized, manageable bars.
- Parchment paper — makes removing and slicing the chilled bars much easier.
- Sharp knife — creates clean, even portions.
- Refrigerator — firms the bars so they hold their shape.
Storage Instructions
Allow the bars to fully set before storing.
- Refrigerator: Store in an airtight container for up to 7–10 days.
- Freezer: Freeze for up to 3 months.
- Container: Use an airtight container with parchment paper between layers.
- Individual portions: Wrap bars individually for convenient grab-and-go snacks.
- Room temperature: They can soften quickly, especially in a warm kitchen, so refrigeration is preferred.
- From frozen: Let a bar sit at room temperature for approximately 5–10 minutes before eating.
For a diabetes-conscious eating pattern, keeping the bars individually portioned makes it easier to manage serving size.
Recipe Details
Preparation Time: 10 minutes
Chilling Time: 1 hour
Total Time: 1 hour 10 minutes
Servings: 12 bars
Best Season: All-season
Total Calories Per Serving: Approximately 155 calories
Short 3-Line Description
These No-Bake Homemade Crunch Bars combine rich chocolate, creamy peanut butter, and crispy cereal in one irresistible bite.
They’re quick to prepare, require no oven, and use sugar-free chocolate for a lower-added-sugar treat.
Perfect for meal prep, afternoon snacks, or a simple diabetes-conscious dessert.
📝 Ingredients
- 1½ cups (150 g) sugar-free dark chocolate chips or sugar-free chocolate baking pieces
- ½ cup (128 g) natural unsweetened creamy peanut butter
- 1 tablespoon (14 g) unsalted butter or coconut oil
- 2 tablespoons (24 g) powdered monk-fruit/erythritol sweetener, optional
- 1½ cups (45 g) unsweetened crispy rice cereal
- ¼ cup (30 g) chopped roasted almonds
- 1 teaspoon vanilla extract
- ¼ teaspoon salt
Optional Topping
- 1 tablespoon unsweetened shredded coconut
- 1 tablespoon finely chopped peanuts
- Small pinch of flaky sea salt
Ingredient Notes
Use unsweetened natural peanut butter to keep added sugar low.
Choose sugar-free chocolate that fits your preferred sweetener and check the label because carbohydrate amounts vary between brands.
For a more protein-friendly version, choose a higher-protein crispy cereal or pair the finished bar with plain Greek yogurt.
Directions
- Prepare the pan.
Line an 8 × 8-inch pan with parchment paper, leaving some paper hanging over the sides for easy removal. - Melt the chocolate.
Place the sugar-free chocolate, peanut butter, and butter or coconut oil in a microwave-safe bowl. Heat for 20–30 seconds at medium power, then stir. - Continue gently melting.
Repeat in 15–20-second intervals, stirring after each interval, until the mixture is smooth and glossy. Avoid overheating. - Add flavor.
Stir in vanilla extract, salt, and powdered monk-fruit/erythritol sweetener if using. - Add the crunchy ingredients.
Gently fold in the crispy rice cereal and chopped almonds. Stir just until everything is evenly coated. - Check the texture.
The mixture should look glossy and well coated, with crunchy pieces distributed throughout. If it seems too dry, add 1 tablespoon peanut butter. - Transfer to the pan.
Pour the mixture into the prepared pan. - Press firmly.
Use the back of a spatula or another sheet of parchment to press the mixture down firmly and evenly. This helps prevent crumbly bars. - Add toppings.
Sprinkle with chopped peanuts, unsweetened coconut, or a tiny amount of flaky sea salt if desired. - Chill.
Refrigerate for at least 1 hour, or until the chocolate is completely firm. - Slice.
Lift the chilled slab from the pan using the parchment paper. Cut into 12 equal bars using a sharp knife. - Serve.
Enjoy chilled or let the bars sit at room temperature for 5 minutes for a slightly softer texture.
Diabetes-Friendly Cooking Tips
Use unsweetened peanut butter and sugar-free chocolate to keep added sugar lower. Also check the cereal label carefully because crispy cereals can contribute a significant amount of carbohydrate even when they contain little or no added sugar.
Nutrition Facts — Per Bar, Approximate
Estimated for 1 of 12 bars using sugar-free chocolate, natural peanut butter, crispy rice cereal, almonds, and a zero-sugar sweetener. Exact values vary considerably by brand.
- Calories: ~155 kcal
- Fat: ~11 g
- Cholesterol: ~0–5 mg
- Sodium: ~75 mg
- Potassium: ~125 mg
- Total Carbohydrates: ~12 g
- Fiber: ~2 g
- Net Carbs: ~10 g
- Sugars: ~1–2 g
- Protein: ~4 g
- Calcium: ~30 mg
Note: These bars are lower in added sugar but are not carbohydrate-free. The cereal and other ingredients still contribute carbohydrates.
Notes
- For lower sugar: Use sugar-free chocolate and unsweetened peanut butter.
- For more protein: Use protein-fortified crispy cereal or serve with plain Greek yogurt.
- For extra crunch: Add roasted almonds, peanuts, or unsweetened coconut.
- For stronger chocolate flavor: Use a darker sugar-free chocolate.
- For a salty-sweet version: Add a small pinch of flaky sea salt.
- For nut-free bars: Use sunflower seed butter and replace almonds with pumpkin seeds, provided they fit your dietary needs.
- For softer bars: Add a little extra peanut butter.
- For firmer bars: Chill for longer or keep them refrigerated until serving.
- Allergy note: Contains peanuts and tree nuts as written. Check chocolate and cereal labels for additional allergens.
- Storage: Refrigerate in an airtight container for up to 7–10 days.
- Freezing: Freeze for up to 3 months with parchment between layers.
- Reheating: No reheating is necessary; allow frozen bars to soften for several minutes before eating.
- Portion tip: Cut the batch into 12 equal bars to make carbohydrate and calorie portions easier to manage.
- Flavor boost: A little vanilla, cinnamon, espresso powder, or sea salt can enhance the chocolate flavor.
Frequently Asked Questions
1. Are these No-Bake Crunch Bars diabetic-friendly?
They are designed to be lower in added sugar, but they still contain carbohydrates, so portion size is important.
2. Do these crunch bars contain added sugar?
The recipe uses sugar-free chocolate and a zero-sugar sweetener, but always check your specific product labels for added sugars.
3. Can I make these bars without peanut butter?
Yes, sunflower seed butter or another suitable unsweetened seed or nut butter can be used.
4. How long do homemade crunch bars last?
They last about 7–10 days refrigerated or up to 3 months in the freezer.
5. Can I freeze these bars?
Yes, wrap them individually or separate layers with parchment paper and freeze for up to 3 months.
6. How can I make them higher in protein?
Use a protein-fortified crunchy cereal or serve each bar alongside plain Greek yogurt or another protein-rich food.